Developing a modern karaoke microphone requires a mix of audio performance, smart connectivity, and thoughtful...
Proper Microphone Positioning for Clearer Vocals
Achieving clear and professional-quality vocals isn’t just about having the right equipment—it’s also about proper microphone positioning. Whether you're using the best cordless microphones, a wireless vocal microphone, or a cordless microphone and speaker, how you hold and place your mic significantly impacts your vocal clarity. Many singers, public speakers, and karaoke enthusiasts overlook microphone technique, leading to muffled, distorted, or weak sound.
This guide will break down essential tips for proper microphone positioning, helping you improve your vocal output, reduce background noise, and achieve a crisp, natural sound.
Why Microphone Positioning Matters
Many people assume that a high-quality wireless vocal microphone will automatically enhance their voice, but that’s not entirely true. Even the best cordless microphones require proper placement to capture your voice effectively.
Here’s why microphone positioning is crucial:
• Prevents distortion and feedback – Holding a microphone too close to the mouth can cause unwanted noise and distortion.
• Enhances vocal clarity – A well-positioned mic ensures your voice is picked up clearly without interference.
• Reduces background noise – Placing the mic correctly helps focus on your voice while minimizing ambient sounds.
• Improves projection – The right mic placement allows for better volume control and vocal balance.
The Basics of Microphone Placement
1. Distance from the Mouth
The ideal distance between your mouth and the microphone depends on the type of mic you're using.
• For handheld microphones (like most cordless microphone and speaker models), keep the mic about 2-3 inches from your mouth for optimal sound capture.
• For wireless vocal microphones with a built-in pop filter, you can hold the mic slightly closer, around 1-2 inches away.
• For studio-style condenser mics, positioning varies, but staying 6-12 inches away often produces the best results.
Holding the microphone too close can lead to unwanted popping sounds (plosives) and muffled audio, while holding it too far away can weaken your voice.
2. Angle Matters
The angle at which you hold your wireless vocal microphone also affects vocal clarity.
• Slightly tilt the mic (45-degree angle) toward your mouth instead of holding it straight up. This reduces breath noise and prevents sudden air bursts from affecting the sound quality.
• Avoid pointing the mic directly at speakers if you're using a cordless microphone and speaker setup to prevent feedback loops.
3. Mic Positioning for Different Singing Styles
Different vocal techniques require different mic placements.
• Soft, intimate singing – Keep the mic close (1-2 inches) and angled slightly for warmth and clarity.
• Powerful belting – Pull the mic slightly away (3-5 inches) to prevent distortion when hitting high notes.
• Rapping or fast-paced vocals – Maintain a steady 2-inch distance and use a pop filter if possible to reduce plosive sounds.
How to Use a Wireless Vocal Microphone for Best Results
Using a wireless vocal microphone provides flexibility, but you still need proper technique to achieve the best sound.
1. Grip the Microphone Correctly
Holding a mic improperly can block its pickup pattern, affecting sound quality.
• Hold the microphone by its handle – Avoid covering the grille (top part), as this can muffle your voice.
• Use a firm but relaxed grip – Avoid squeezing the mic too tightly, which can cause handling noise.
2. Avoid "Cupping" the Mic
Cupping the microphone (wrapping your hands around the top) disrupts airflow and can lead to poor sound quality. This mistake is common among new singers and can cause muffled audio and feedback issues.
3. Monitor Your Volume Levels
With a cordless microphone and speaker setup, it's essential to adjust the volume properly.
• Check for distortion – If your voice sounds too loud or crackly, lower the mic gain.
• Listen for feedback – If you hear a high-pitched ringing, reposition yourself further from the speakers.
• Balance mic sensitivity – Some best cordless microphones have adjustable gain controls, so experiment with different levels to find the perfect balance.
Best Microphone Positions for Different Situations
1. Live Performances
In a live setting, clear sound projection is essential.
• Keep a steady distance – Avoid pulling the mic too far away when moving.
• Stay aware of speakers – Position yourself so that the wireless vocal microphone isn’t facing directly at a speaker to prevent feedback.
• Use a mic stand if needed – For stability and better control over positioning.
2. Recording at Home
For home recording or streaming, a cordless microphone and speaker setup allows more flexibility.
• Use a pop filter – This helps reduce plosive sounds (like "P" and "B" sounds).
• Keep a consistent mic height – Adjust the stand to align with your mouth level.
• Find a quiet space – Background noise can interfere with vocal clarity.
3. Public Speaking and Presentations
If you're using a wireless vocal microphone for speeches or presentations:
• Hold the mic at chin level – This keeps the focus on your voice while allowing natural projection.
• Avoid moving the mic too much – Rapid movements can create inconsistent audio.
• Use a headset mic if available – Some best cordless microphones come with headset options for hands-free speaking.
Common Microphone Mistakes and How to Fix Them
Even with the right equipment, improper mic technique can affect sound quality. Here are some mistakes to avoid:
Mistake: Holding the mic too close
How to Fix: Keep a 2–3 inch distance for best clarity.
Mistake: Speaking directly into the mic
How to Fix: Angle the wireless vocal microphone slightly to reduce popping sounds.
Mistake: Cupping the mic
How to Fix: Hold by the handle to avoid muffled audio.
Mistake: Ignoring speaker placement
How to Fix: Position the cordless microphone and speaker setup to minimize feedback.
Mistake: Moving the mic erratically
How to Fix: Maintain a steady hand or use a mic stand.
Choosing the Best Cordless Microphone for Clear Vocals
If you're in the market for a wireless vocal microphone, consider the following features:
• Stable Bluetooth or RF connection – Ensures clear audio without dropouts.
• Noise cancellation technology – Helps reduce background noise.
• Long battery life – Essential for long performances.
• Adjustable gain and volume control – Allows for better sound customization.
Some of the best cordless microphones available include:
• Shure BLX288/PG58 –Ideal for live performances with crisp sound quality.
• TONOR Wireless Microphone – Budget-friendly with strong connectivity.
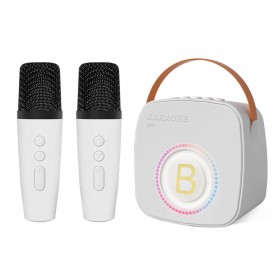
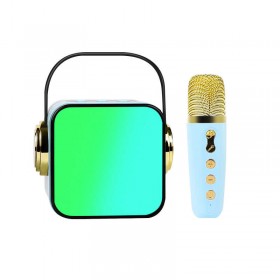
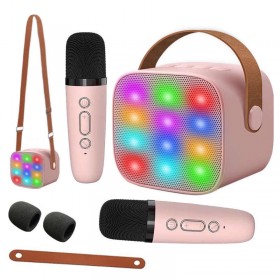
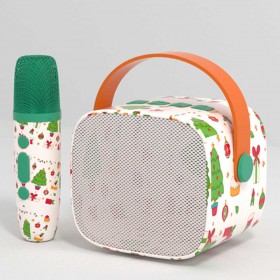
• BONAOK Karaoke Microphone – A cordless microphone and speaker combo, perfect for home karaoke.
Conclusion
Proper microphone positioning is essential for achieving clear and professional-sounding vocals. Whether you're using the best cordless microphones for live performances, a wireless vocal microphone for presentations, or a cordless microphone and speaker for home karaoke, small adjustments in mic placement can make a significant difference.
By maintaining the right distance, angle, and grip, you can reduce background noise, prevent distortion, and ensure your voice is heard with clarity. Next time you pick up a microphone, use these positioning techniques to elevate your vocal performance.



Latest comments