Developing a modern karaoke microphone requires a mix of audio performance, smart connectivity, and thoughtful...
How to Adjust Echo & Reverb for the Best Karaoke Experience
Karaoke is a favorite pastime for many, offering a chance to sing along to beloved songs, whether at home, in a bar, or at a party. However, to truly shine, you need the right sound settings. The way your voice is processed can make a big difference in how professional and enjoyable your performance sounds. Whether you’re using a karaoke mic, a microphone with speaker, or investing in the best karaoke equipment, knowing how to fine-tune your echo and reverb settings is crucial.
Without proper adjustments, too much echo can make your voice sound distant and unclear, while too little reverb can leave it sounding dry and lifeless. In this guide, we’ll break down everything you need to know about echo and reverb, their differences, and how to adjust them for the best karaoke experience.
Understanding Echo and Reverb
To get the best sound from your karaoke mic, you first need to understand what echo and reverb do and how they affect your voice.
What Is Echo?
Echo occurs when sound waves reflect off surfaces and return as distinct repetitions. If you've ever shouted into a canyon and heard your voice repeat back to you, that's an extreme example of echo. In karaoke, too much echo makes lyrics difficult to understand because the repeated sound clashes with the original voice.
What Is Reverb?
Reverb (short for reverberation) happens when sound bounces off multiple surfaces, creating a fuller, more ambient effect. Unlike echo, reverb doesn’t create distinct repetitions of sound. Instead, it mimics the natural acoustics of spaces like concert halls or cathedrals. A little reverb makes a voice sound richer, but too much can make it muddy.
Both effects play a role in making karaoke sound more immersive, but the challenge is finding the right balance.
Why Adjusting Echo and Reverb Matters in Karaoke
Properly adjusting echo and reverb can:
• Improve vocal clarity
• Add depth and warmth to your voice
• Make your singing sound more polished
• Prevent distortion or muddiness
• Help blend your voice with the music
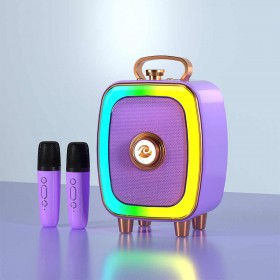
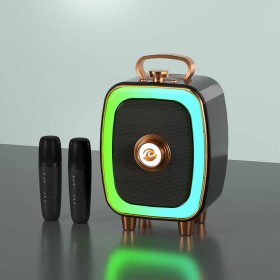
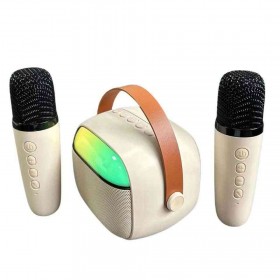
If you’re using a microphone with speaker that has built-in effects, tweaking these settings will help optimize your sound. Even if you’re using a professional setup with the best karaoke equipment, understanding these adjustments is key to creating an enjoyable experience.
Step-by-Step Guide to Adjusting Echo and Reverb
Now that you understand the basics, let’s dive into the step-by-step process of adjusting echo and reverb for karaoke.
Step 1: Start with a Neutral Setting
Before making any changes, reset all sound effects on your karaoke mic or karaoke system to their default or neutral positions. This gives you a clean slate to work from. If your microphone with speaker has preset modes, start with the "flat" or "natural" setting.
Step 2: Adjust Reverb First
Reverb is essential for giving your voice a natural and professional sound. To set it correctly:
1. Start with a low reverb level.
2. Gradually increase it while singing a few lines of a song.
3. Stop when your voice sounds fuller but still clear.
4. Avoid overdoing it, as too much reverb can make lyrics hard to distinguish.
A good rule of thumb is to add enough reverb so your voice doesn’t sound dry but not so much that it overpowers the words.
Step 3: Fine-Tune Echo
Once reverb is set, adjust the echo:
1. Begin with zero echo.
2. Increase it slowly while singing.
3. Keep it subtle—echo should enhance, not overshadow, your voice.
4. If you notice a distinct repetition of your voice, reduce the echo level.
Some karaoke systems let you adjust the delay of the echo. A short delay (like 100-200ms) creates a slight doubling effect, while a longer delay (over 300ms) produces a more obvious repetition.
Step 4: Test with Different Songs
Not all songs require the same amount of echo and reverb. A ballad might benefit from more reverb, while a fast pop song might need minimal effects. Test your settings with various genres to find a balance that works across different styles.
Step 5: Adjust for Your Environment
Your singing environment affects how sound behaves. In a small room, sound reflects quickly, so you might need less reverb. In a large space, more reverb might be necessary to compensate for the lack of natural reflections. The best karaoke equipment will let you tweak these settings to match different environments.
Using Echo and Reverb on Different Karaoke Setups
1. Built-in Effects on a Microphone with Speaker
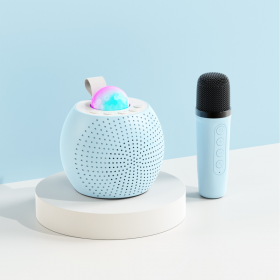
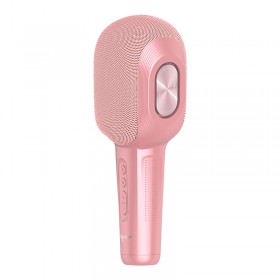
Many wireless karaoke microphones come with built-in reverb and echo controls. If you’re using a microphone with speaker, look for buttons or knobs labeled "Echo" or "Reverb." Adjust them incrementally while singing to find the best setting.
2. Karaoke Machines and Mixers
If you’re using a karaoke system with an external mixer, you’ll have more control over these effects. Mixers often allow you to set precise echo delays and reverb types (e.g., room, hall, plate).
3. Karaoke Apps and Software
Some karaoke apps let you apply echo and reverb digitally. Look for sound effects settings in the app and tweak them as needed.
Common Mistakes to Avoid
Even with the best karaoke equipment, incorrect settings can ruin your performance. Here are some common mistakes and how to fix them:
• Too much echo – Makes vocals unclear. Reduce echo and shorten delay time.
• Excessive reverb – Creates a muddy, distant sound. Lower the reverb level.
• Not enough reverb – Leaves vocals dry. Increase reverb slightly for warmth.
• Ignoring room acoustics – Adjust effects based on whether you’re singing in a small room or a large hall.
1. Know the model of your karaoke microphone and the model of the device you are using.
2. If you have a wired connection, please purchase the relevant cable before connecting the device and the microphone.
3. If you want to connect wirelessly, please remember to turn on the Bluetooth function in the device to connect.
Final Tips for the Best Karaoke Sound
• Use high-quality equipment. A cheap karaoke mic may not have good sound processing, so investing in the best karaoke equipment will improve your performance.
• Position your microphone correctly. Hold it at the right distance (about 4-6 inches from your mouth) to avoid excessive sound pickup.
• Practice adjusting settings. The more you tweak reverb and echo, the better you’ll understand how they work.
• Record yourself. Listening back will help you hear whether your settings enhance or hinder your vocals.
Conclusion
Adjusting echo and reverb is essential for achieving a professional karaoke sound. Whether you're using a karaoke mic, a microphone with speaker, or high-end best karaoke equipment, the right balance of these effects can transform your performance. Start with neutral settings, gradually adjust reverb, fine-tune echo, and test with different songs and environments. With the right adjustments, your voice will sound clearer, richer, and more polished—making every karaoke session a hit!







Latest comments